My current lab environment is using a three node vSAN cluster which is doing a great job in providing storage to a vSphere 5.5 environment. But guess what, I’d really like to better leverage six terabytes of storage. vSAN only provides low level datastore storage for VMDK but the good news is the recent release of NexentaConnect for vSAN which provide NAS capability on top of vSAN, wow, outstanding idea. So lets do a step by step approach to discover and install it.
NexentaConnect for vSAN provides the following functionnality:
- NFSv3, NFSv4, and SMB file service
- Inline compression and deduplication
- Instant or scheduled folder level snapshots for Data protection
- HA and DRS support
- Active Directory support
- Complete management through the vSphere Web Client interface
- Performance monitoring and analytics: IOPS, latency, capacity, data reduction, acceleration.
It’s composed of the following software components
- Web Client plugin - user interface to manage IO Engine folders from VMware vSphere Web Client.
- Manager - Processes all operations between vSAN and NexentaConnect for VSAN plugin.
- IO Engine - Provides file services, such as NFS and SMB, as well as snapshots creation capability and Auto-Snap service.
You’ll need the following pre-requisites :
- vCenter Server 5.5u1 or later
- vSphere 5.5 or later
- vSAN 1.0 or later
- DNS
- DHCP required on IO Engine Port Group.
- Static IP address for Nexenta IO Engine
- 9000 MTU configuration on your switching fabric for best performance
The evaluation licence last for 45 days.
Lets now get started.
Downloading
To get the NexentaConnect for vSAN, you just need to register on their download page to download the following components :
- NexentaConnect Manager OVF template
- NexentaConnect IO Engine OVF template
- NexentaConnect for vSAN vSphere Web Client Plugin (windows installer)
Deploy Manager
First prepare the following information:
- Manager VM name
- Manager VM location
- Host where Manager should run
- Datastore where it should be stored
- Network on which it should be connected
From the vSphere Web Client, deploy the previously downloaded Manager OVF template, choose to power on after deployment and use the information you’ve prepared above.
Once booted you just need to launch the Manager VM console to assign a static address by entering the Configure Network Interface menu.
In the Setup Hostname, type the static IP address and assign a netmask, gateway and DNS server.
It’s maybe a good idea to also configure the NexentaConnect Manager Timezone, it’s possible from the same console.
Deploy IO Engine OVF template
Now deploy the IO Engine, as we’ve seen before you’ll need the same checklist ready :
- IO Engine VM name
- IO Engine VM location
- Host where IO Engine should run
- Datastore where it should be stored
- Network on which it should be connected
Do not power on the VM after deployment, it will only be used for cloning operation.
Web Client
As specified in the 1.0 User Guide, your VMware vCenter Server need to be running on Windows. Unfortunately my lab is using a linux appliance instead. It gave me a good opportunity to interact with their technical team to see if there is any workaround available.
I was amazed by the answer I got, just 40 minutes after having sent an email on a Sunday afternoon, I got a nice workaround that allowed me to do the vSphere Web Client plugin installation on my Linux vCenter.
But by the time you read this, you should see a 1.0.1 update which will officially support vCenter Linux Appliance. Great isn’t it. So I’m not going sharing the gory details of the steps involved for 1.0.
For windows based vCenter, Nexenta already provides an msi installer. Just run it and follow the installation wizard.
Configuration
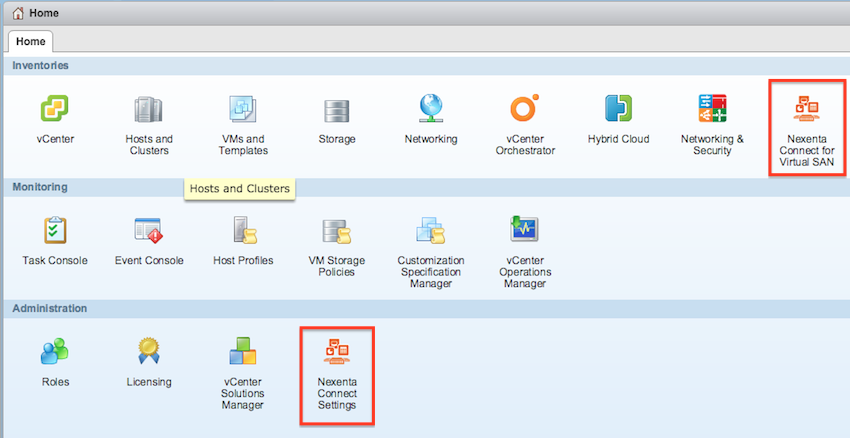
Next time you loggin to your vSphere Web client, you’ll see two newly added icons, it will confirm that your plugin was correctly installed.

First click on NexentaConnect Settings > Edit and fill out the following required fields
- Manager IP Address: how to reach the Nexenta Manager
- IO Engine Template Name: leave default (NexentaConnect IO Engine Template), or put a new name if you’ve renamed the IO Template.
Click OK and click on VMware vCenter Settings > Edit, to configure vCenter access.
- Connection Address: of the vCenter where vSAN is configured
- Username: vCenter admin username
- Password: vCenter admin password
If you want to connect to a Active Directory, click on Configure Network and select the kind of connectivity: Domain or Workgroup. Consult the User Guide (see link at the bottom) for more details.
Adding a Shared Folder
Now you can access NexentaConnect for vSAN Management UI from the vSphere Web Client Home Page by clicking on the NexentaConnect for Virtual SAN icon from the vCenter homepage.
Make sure you already have a vSAN storage policy created, consult vSAN documentation to create one if that’s not the case.
Because it’s our first created shared folder, NexentaConnect will be cloning our IO Engine Template, so when configuring it you’ll need to specify a static IP address/Portgroup for this VM.
Now to create a shared folder:
- Select a vSAN datastore
- click Summary tab
- Under File Services, click the Add folder
- Fill-out the form with: Folder Name, IP/PortGroup of IO Engine, Share Type (NFS/SMB), Storage Policy, Max Size, Anonymous access ?, Data Reduction Algorithm, ..
- Click Create
When wecreate our first shared folder. For each of them, NexentaConnect will clone IO Engine Clone
Access Permissions
By default SMB will allow access to the smb user but by using the AD integration other users can be granted access.
NFS on the contrary only allows two mode of access, from a Unix root account (AUTH_SYS) or from an anonymous user (AUTH_NONE), it will then be mapped to the user nobody. If you use the root user option, you can restrict access to a specific network segment or host.
Mounting an NFS shares on Mac OSX
Ok now we have a shared NFS volume, lets mount it on a OSX. You can do this by using the following command :
	$ sudo mkdir /private/nfs
	$ sudo mount -o rw -t nfs  /private/nfs
	$ sudo mount -t nfs nfs -o soft,timeo=900,retrans=3,vers=3, proto=tcp <IP OF IOENGINE>:/<NAME_OF_SHARE> /private/nfs
Verify if it worked
	$ df -H
	$ cd /private/nfs
	$ ls -l
	$ touch test_file
	$ rm test_file
Conclusion
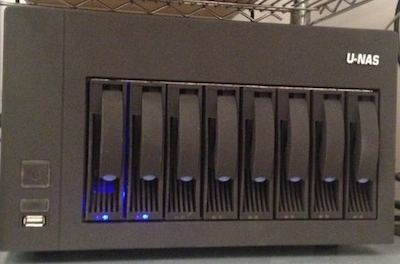
Nexenta is using the outstanding ZFS filesystem which is the best one around and enable lots of Enterprise feature like volume snapshotting for example. They’ve made all the NexentaConnect for vSAN management functions available thru their vSphere Web Client plugin which makes all the operation a breeze. Being able to publish SMD/NFS shares from vSAN datastore is a killer feature. When you look at my server form factor below, you can guess why I’m really excited by such a solution from Nexenta.
